We love the holidays here at Franz Witte and we will do anything to keep the cozy cheer right through the season.
What is one of the most versatile pieces of fall home décor in Boise? You guessed it: pumpkins.
All you gardeners did not spend this sweltering summer tending to your pumpkins just to throw them out on November first, did you? All you pumpkin patch hunters did not spend countless hours in the back of the field to find your perfect fit just to toss it out after the first hard frost, did you?
Perhaps you have too many pumpkins crowding your doorway, your coffee table, your mantle, and your shelving. Every open surface just calling your name to put another mini gourd in its place.
Well, to anyone and everyone who still has a spare pumpkin or two just laying around, this one’s for you.
(Don’t have any live pumpkins? Stop by your nearest craft store for faux pumpkins, they work just as well.)
Materials
- Pumpkin (faux or real)
- Pressed flowers
- Foam brush or 1” paintbrush
- Fine paintbrush (optional)
- Mod Podge

Step 1:
Collect flowers and foliage to press
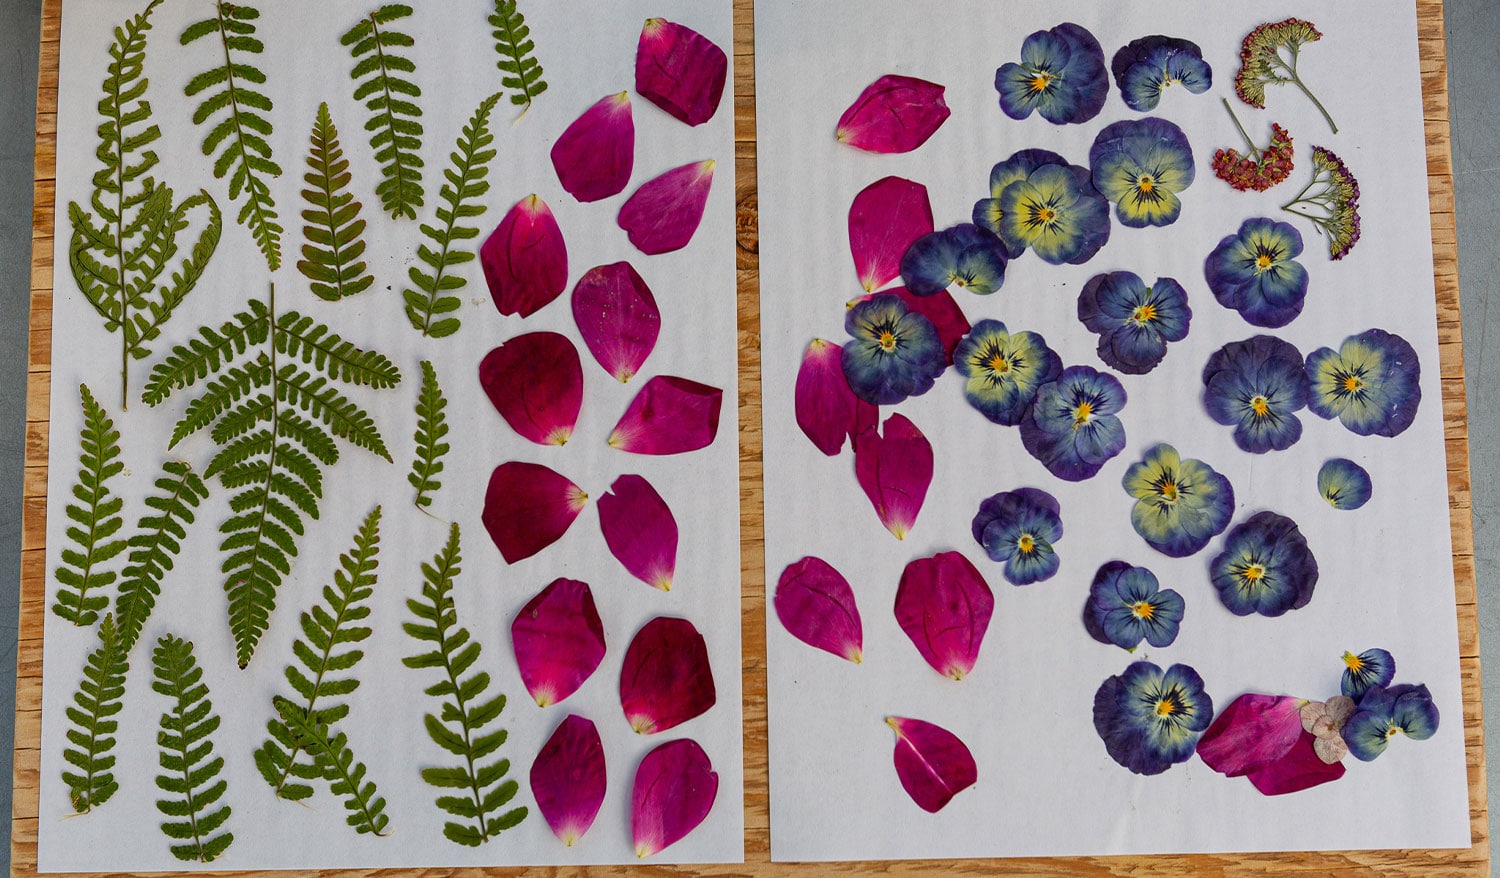
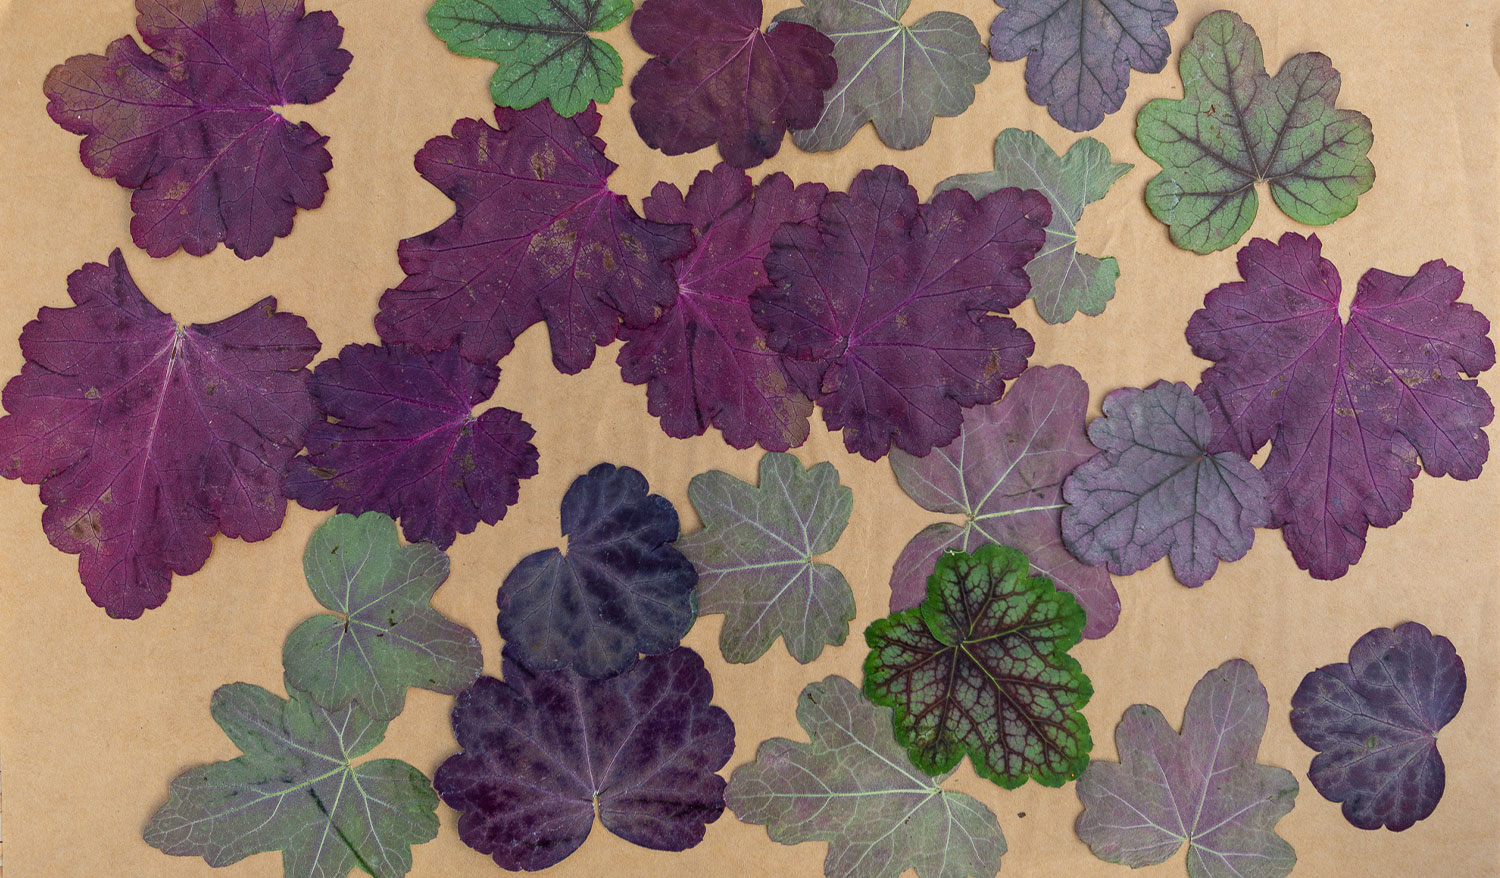
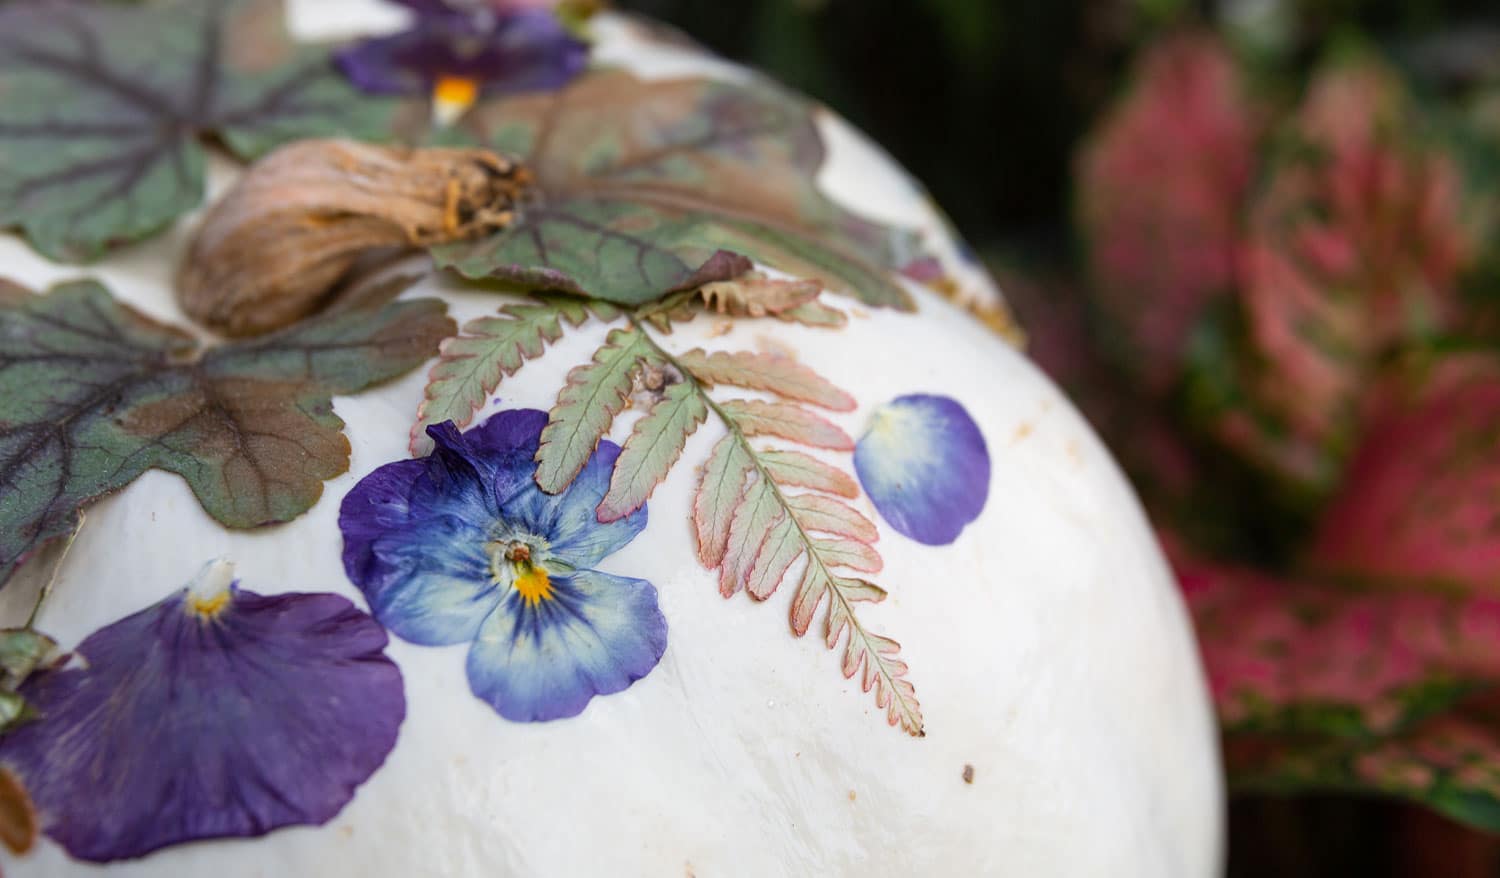
Even with the cool temperatures encroaching in the Treasure Valley, you just might be surprised at the colors still awaiting to be discovered. Heuchera, ginkgo, and fern foliage make for perfect presses.
Violas and pansies along with lavender, yarrow, individual hydrangea flowers, and rose petals typically keep their color until November. We found all of these around the garden center and harvested them to be pressed. Choosing vibrant specimens aids in color retention once they are flattened.
Our artist in resident, Lily, gave a pointer on specimen selection, “Choose whatever can press flat, there are some flowers that are bulkier and won’t press very well. That’s why I chose to press individual rose petals rather than a whole flower.”
How to Press Flowers:
Whether you have a professional wood press or a heavy-duty textbook and some weights, flower pressing is a simple and fun task!
- Obtain either newspaper, blotting paper, printer paper, or flat cardboard (avoid paper towels as the texture may imprint your flowers)
- Lay your flowers face down on the paper, as flat as possible—it is ideal to remove stems if they are fleshy or bulky
- Lay a second piece of paper over the top of your flowers
- If using a book, place your covered flowers within the pages and weigh down with a heavy object
- Keep in mind that the pigment of flowers may stain through the paper. If you do not want to taint the book pages, add a few extra layers of paper.
- If using a wood press, layer as many tiers as you would like or are permitted and tighten down
- Wait about 1 week before checking on flowers, more time may be needed for complete drying
Step 2
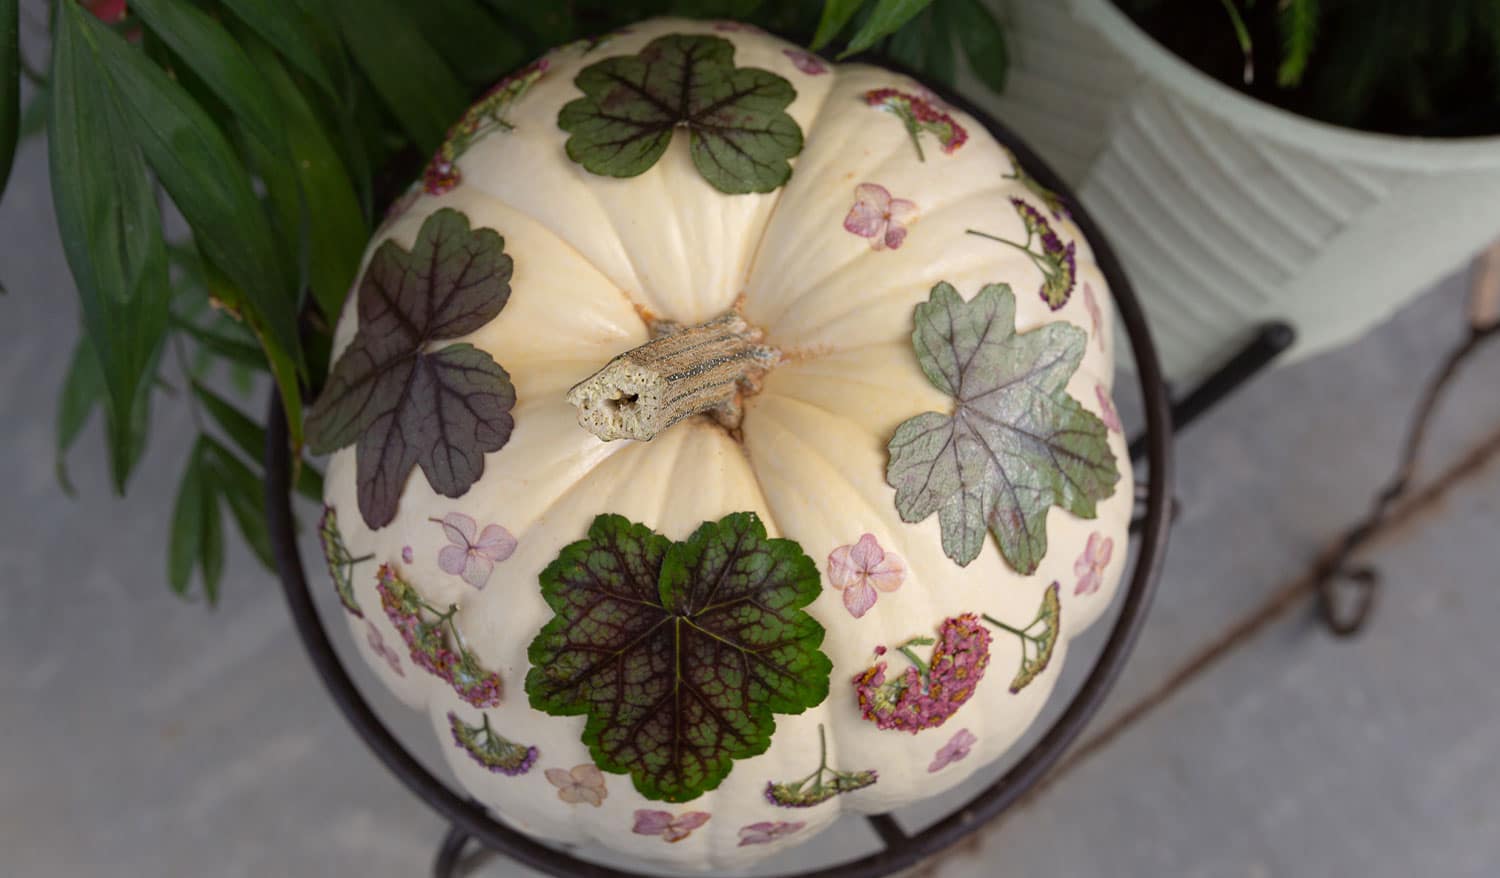
Select pumpkin and clean
Once you have your flowers all ready, pick the pumpkin you would like to decorate with. We used a specialty white pumpkin and it made the colors of the flowers really pop.
Be sure to clean off any dirt or grime on your pumpkin, this will aid in the sticking process.
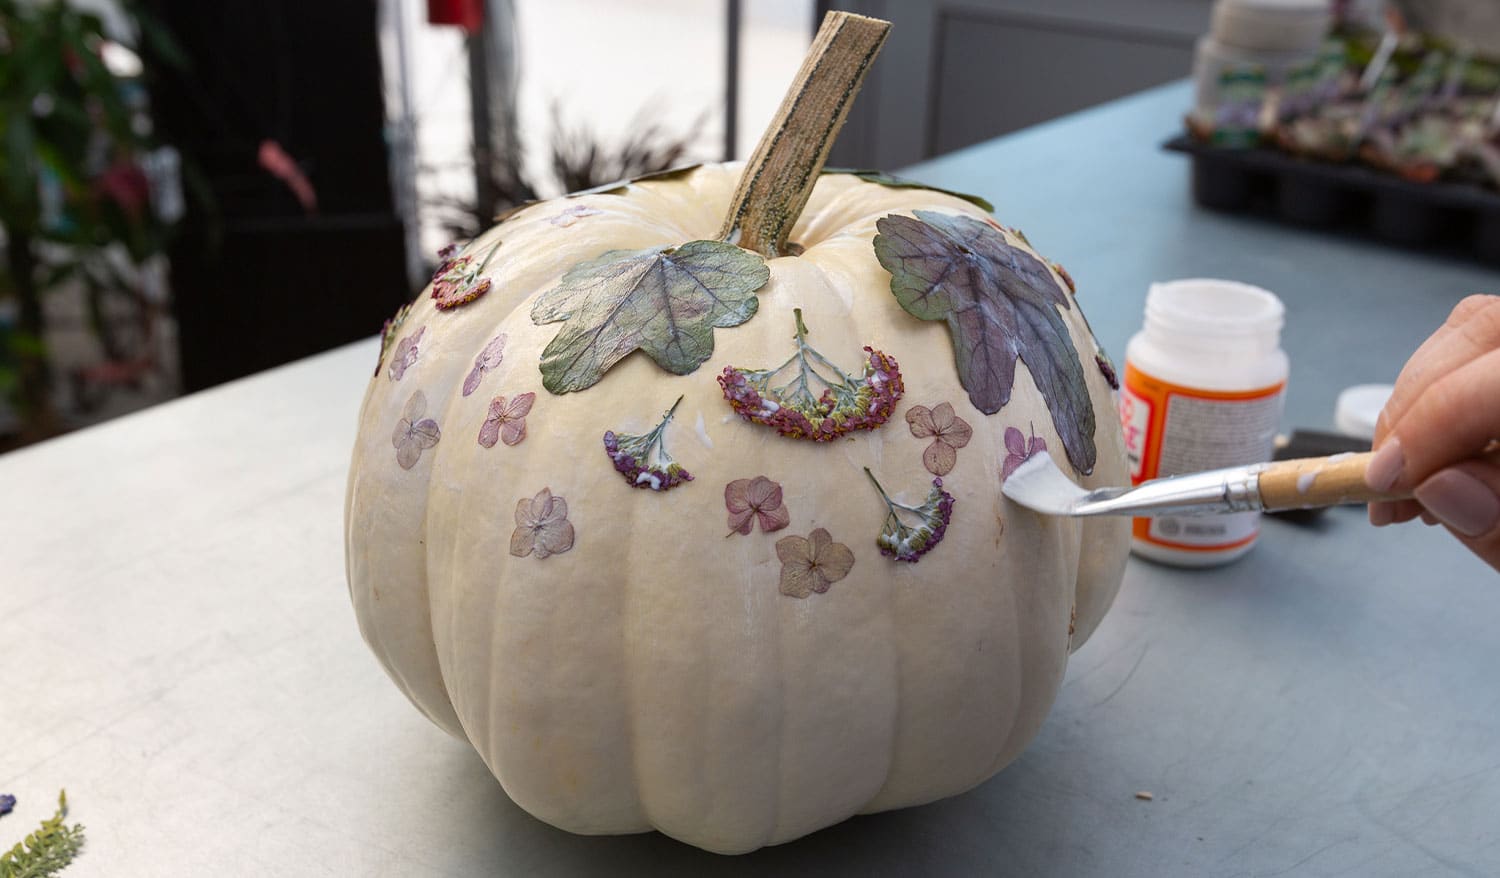
Step 3
Use Mod Podge
After your pumpkin is clean and dry, use the foam or 1” brush to apply Mod Podge completely over the pumpkin.
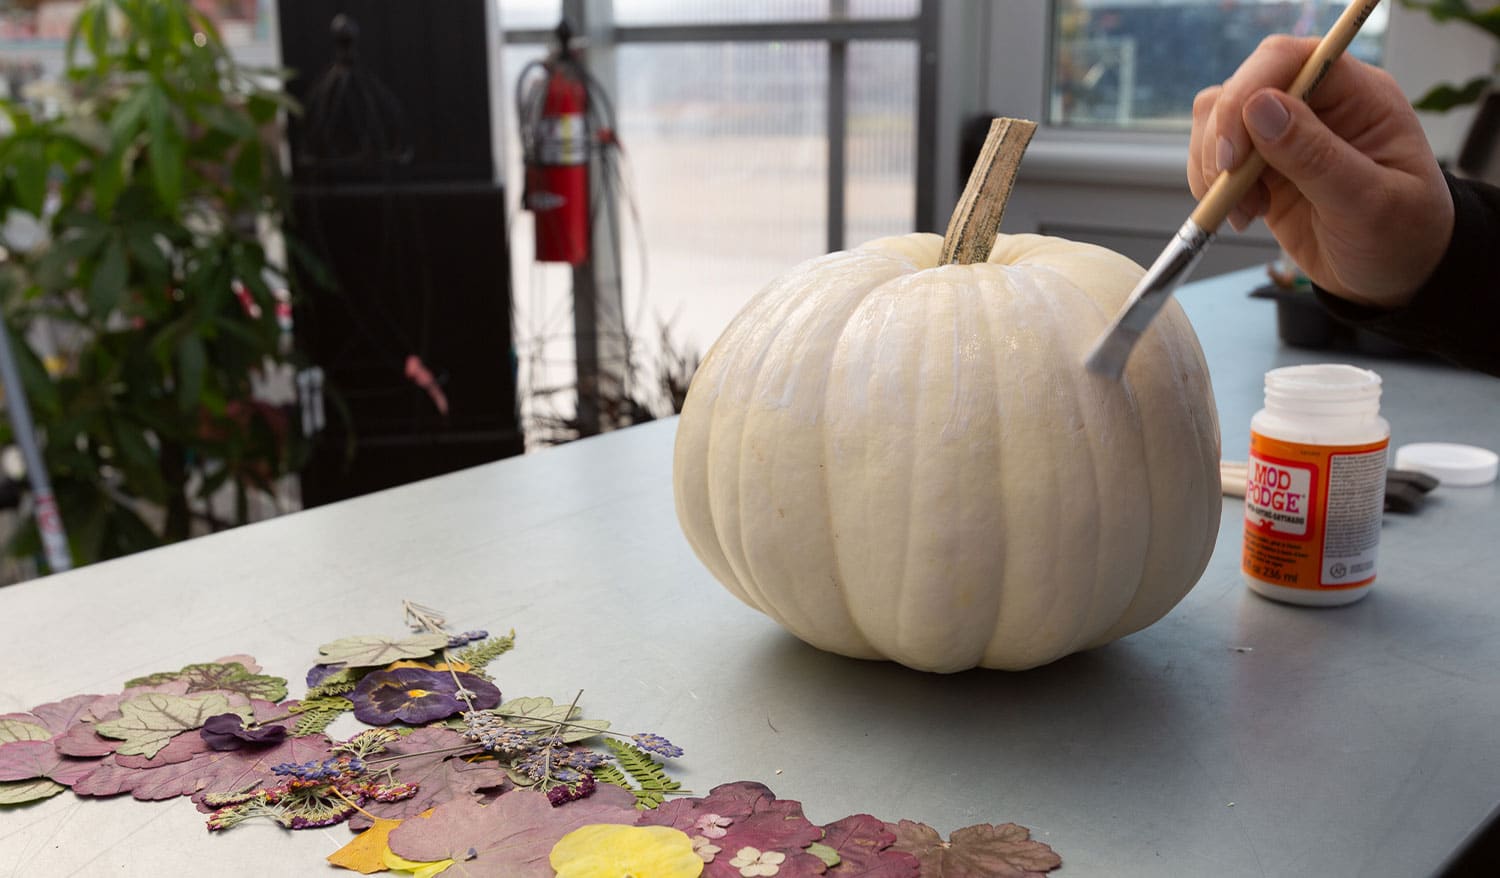
Begin placing individual flowers on top of the Mod Podge.
Take the large brush again and apply a layer of Mod Podge completely over the flowers. It will dry clear.
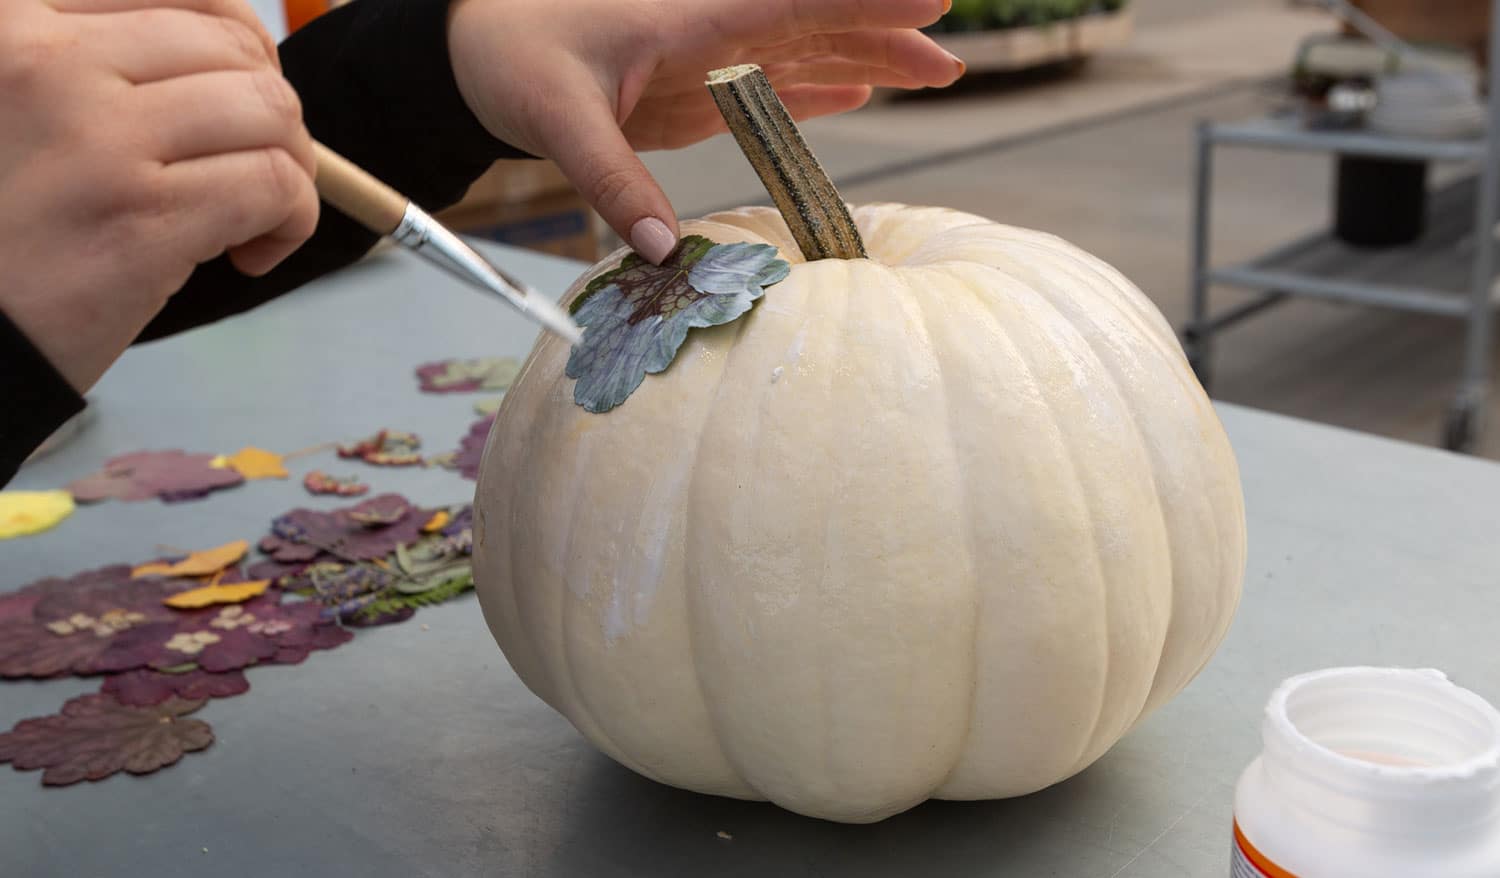
You may need to use the finer brush to precisely apply more Mod Podge, especially on the corners and edges of your flowers. This will keep them down and ensure they stick fully to the pumpkin.
Continue repeating this process until you are satisfied with your masterpiece! Customize and make it as simple or as intricate as you would like.
We would love to see your creations! Tag us @franzwitte1971 on Instagram or Facebook and show us what you made.
Want more guidance for DIY projects? Take a workshop class at Franz Witte! We have plenty of upcoming classes here, especially for the holidays. We would love to have you. All of our workshops take place in the greenhouse, taught by our talented artist in residence, Lily. Masks are not required, but we do recommend them.
While you are at Franz Witte, shop our selection of specialty house plants, peruse our local gift shop, find unique treasures for your loved ones, and get inspired!
By Riley Rehberg