Is anyone else already missing the prolific blooms of summer? Well, we’re here to offer the next best thing. Amaryllis flowers bring a bright exuberance to the home, and growing them indoors might be the floral pick-me-up you need.
Amaryllis flowers are perfect for the holiday season because of their indoor bloom time, and many favor the bold reds and pure whites that these flowers offer. These bulbs also make for a beautiful gift.
If you’re looking to brighten your home with a bountiful flower, here is a step-by-step guide on how to plant an amaryllis bulb. We have amaryllis kits for sale in the garden center, which we used for this demonstration. Each kit comes with everything you need – soil included!
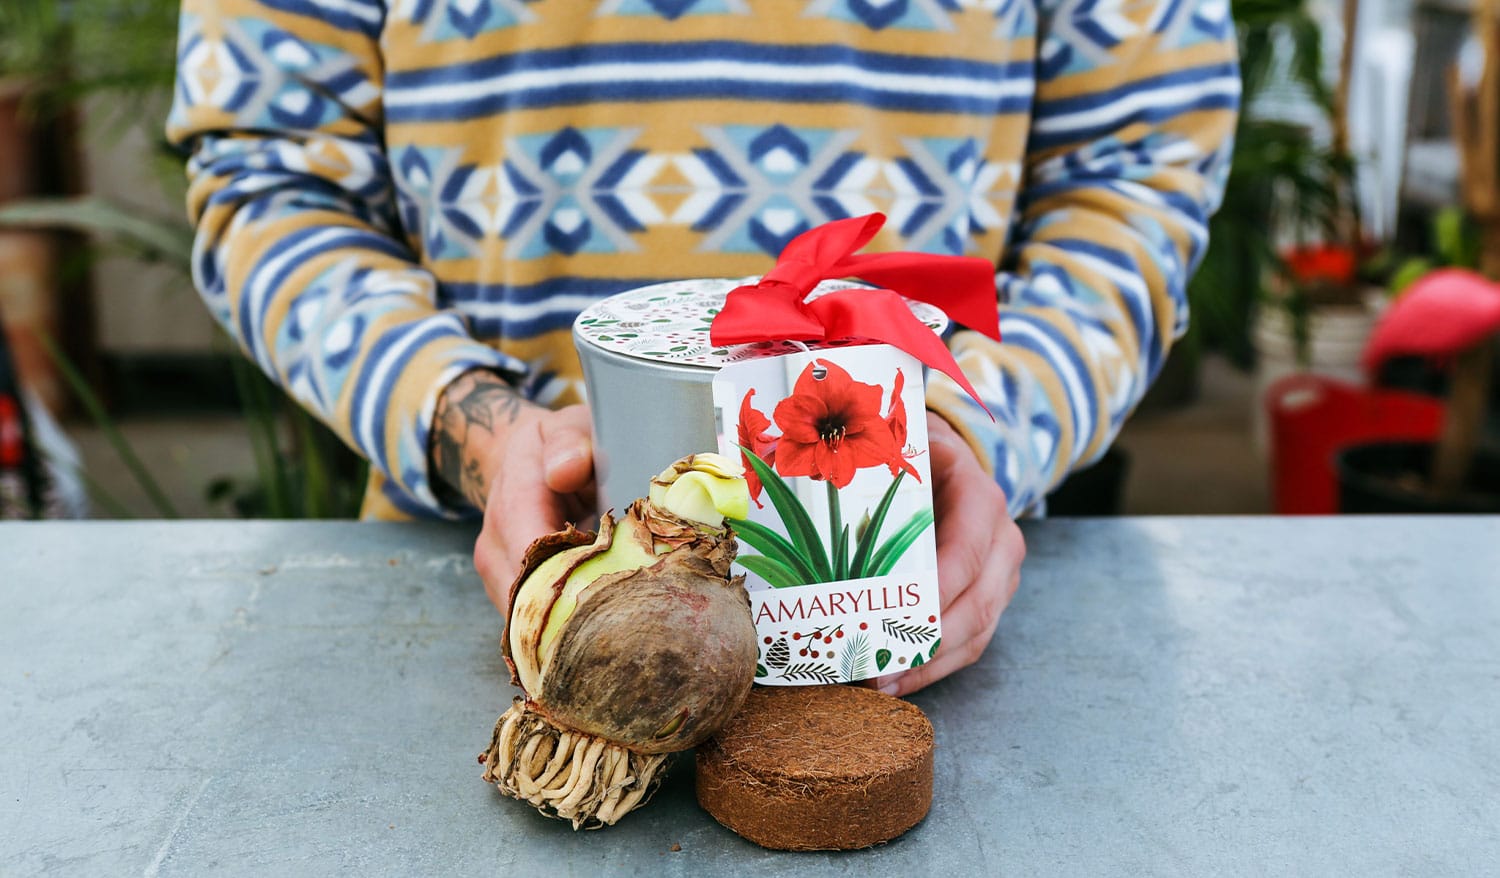
If you already have a bulb, these instructions are still for you. If you’re still looking for a planter, amaryllis bulbs prefer to be slightly crowded, and many people opt for a clear glass bowl. About an inch or two should be between the edge of the bowl (or pot) and your bulb. We recommend using soil that is well-draining and high in organic matter. Mixing perlite and peat moss into all-purpose potting soil should set you up for success.
Skip to Step 2 if you are not using our amaryllis kit.
Step 1
Hydrate the Cocopeat disk with about 1½ cups of water. Allow the disk to absorb the water and expand into the growing medium. This can take up to 15 minutes.

Step 2
Fill about 2/3 of the pot with planting mix and create a shallow hole for the bulb.
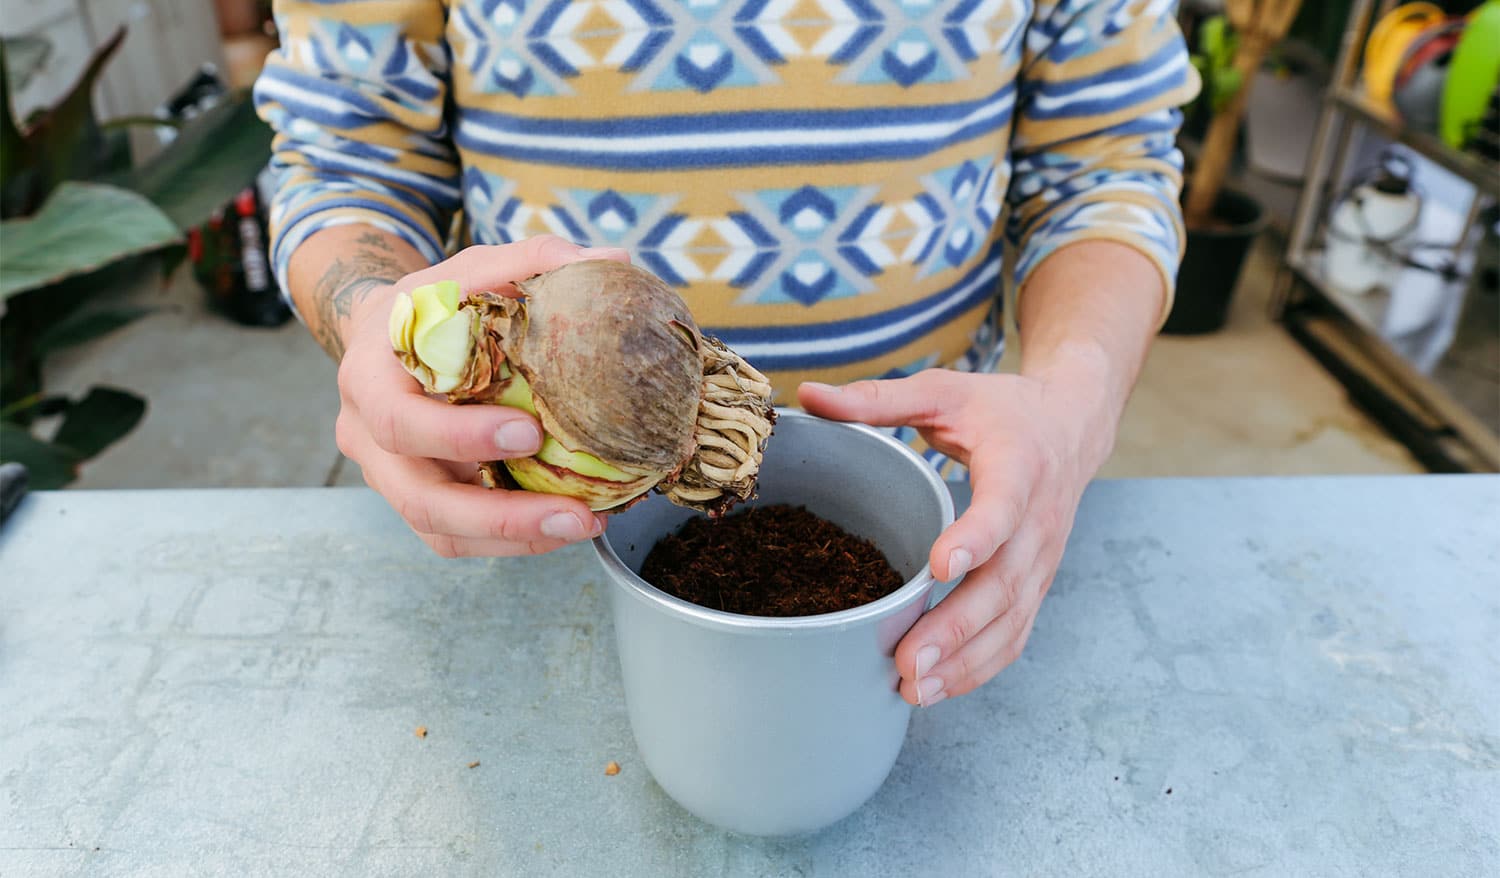
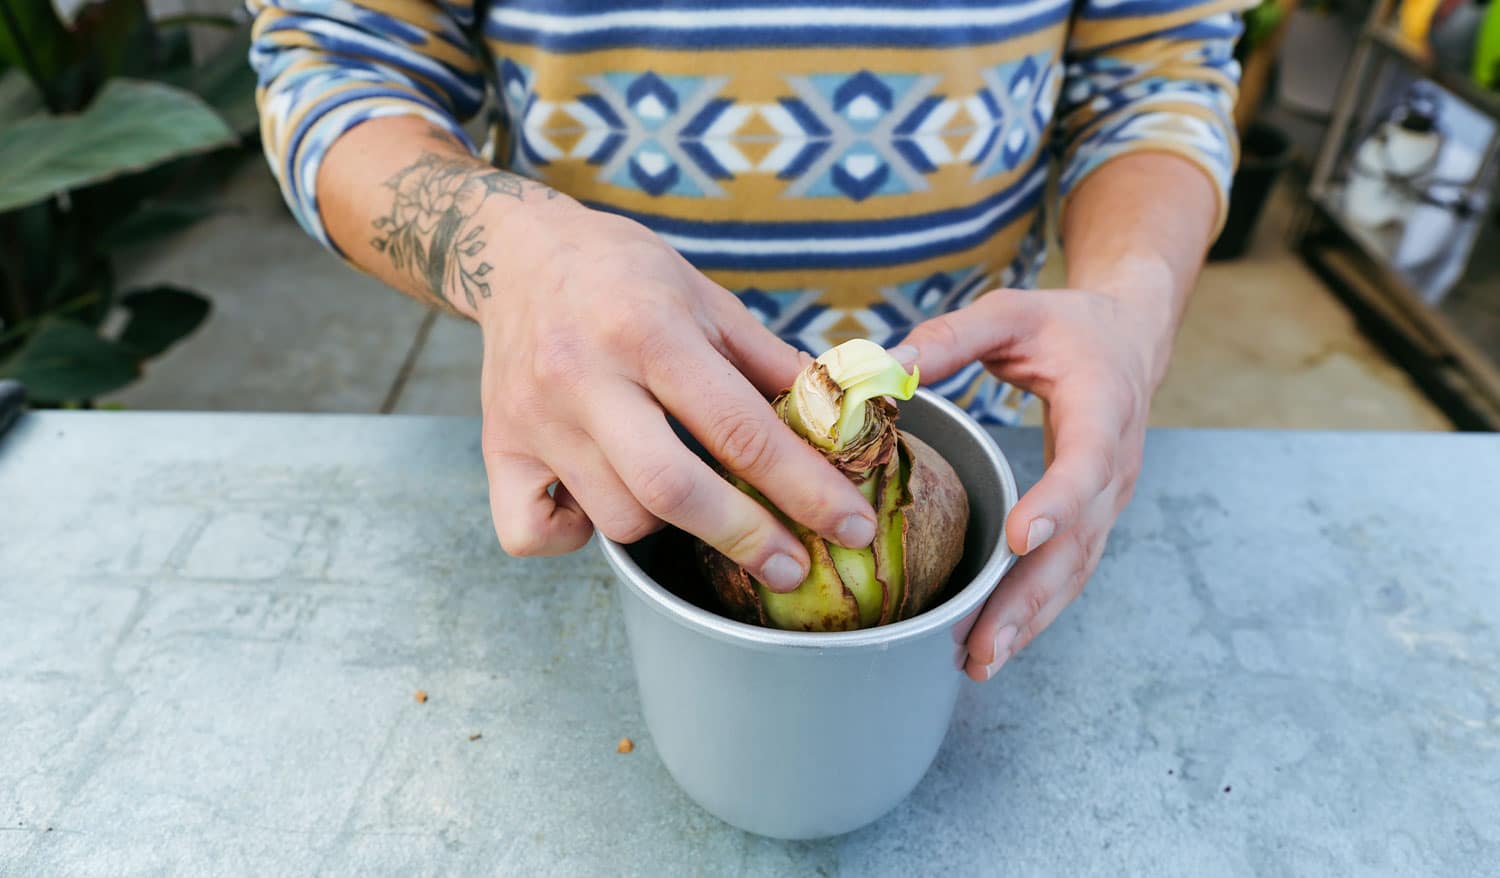
Step 3
Place the bulb roots down in the soil.
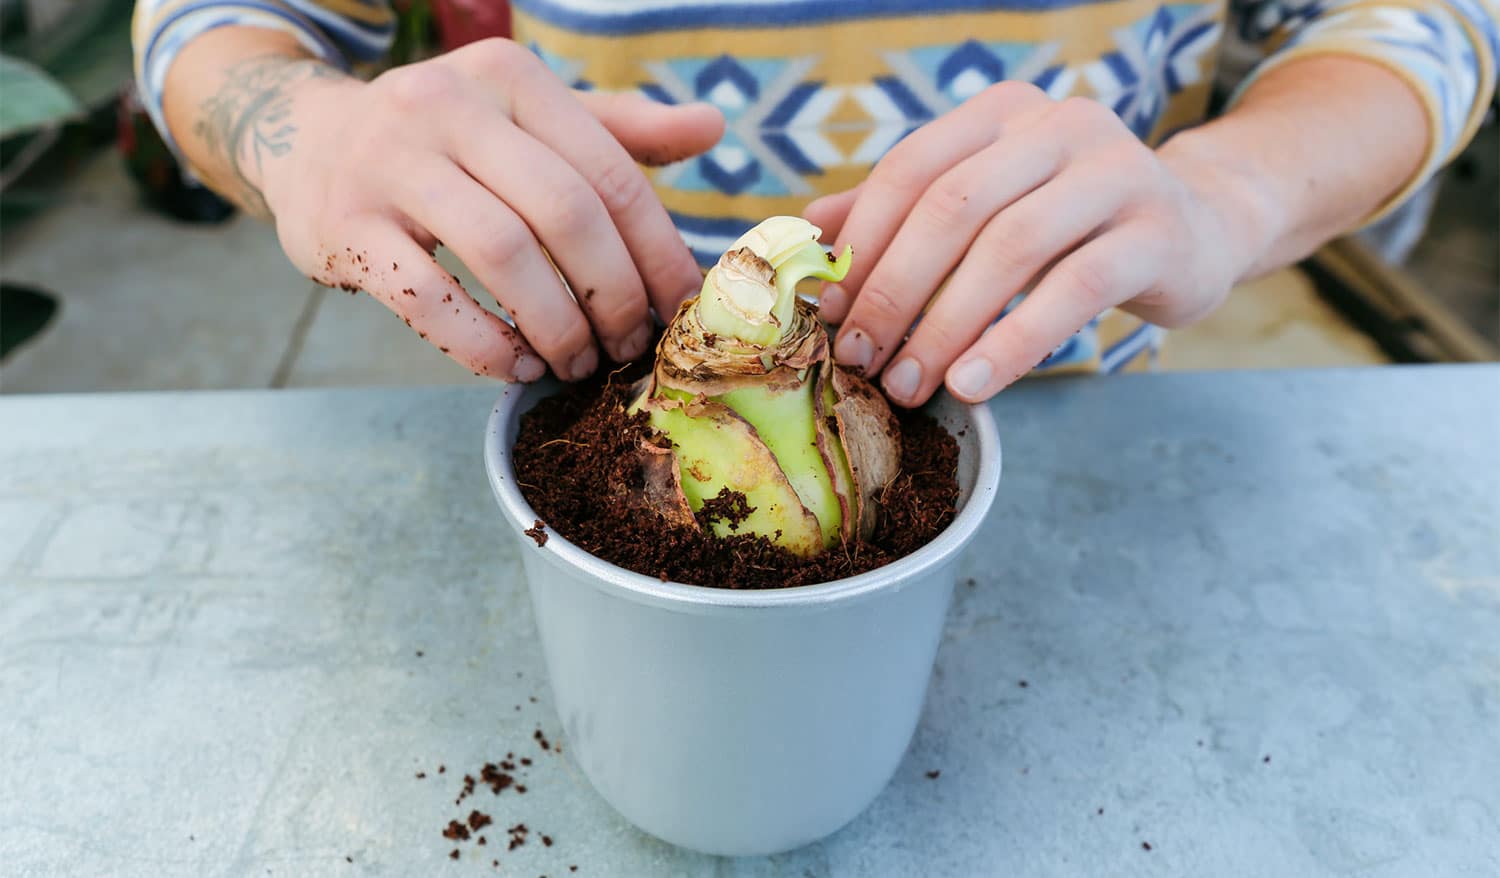
Step 4
Add additional planting mix around the bulb to secure it. Leave about 1/3 of the bulb exposed and dust off any excess soil that gets in or on the bulb.
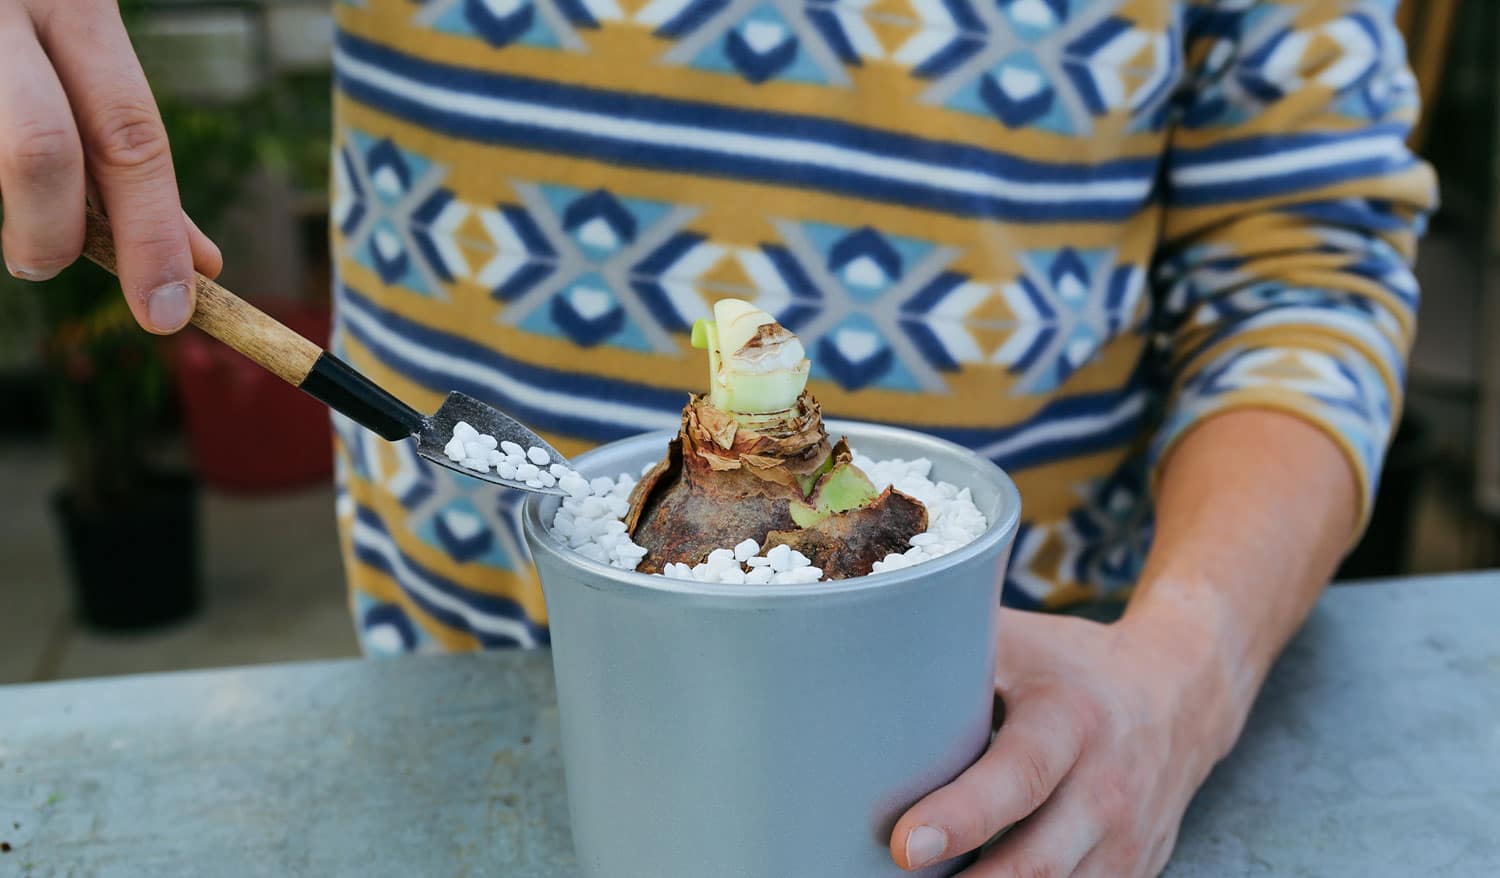
Step 5
Top-dress with moss or decorative pebbles (optional).
Step 6
Water in your bulb and place it in bright light.
Water sparingly until you see stocks begin to emerge. From there, water weekly to keep the soil moist but not wet. The leaves of your amaryllis will likely appear first and then bloom.
Turn the pot occasionally to prevent your plant from leaning. Sometimes the stems are not strong enough to hold the flower up, so you may need to stake the plant to prevent the stems from toppling over.
For an in-depth guide on amaryllis, head to Laura at Garden Answer’s YouTube page and check out her video.
Along with amaryllis, our garden center has many gift options this time of year. You’re bound to find treasures for everyone when you shop with us! If you want more guidance on DIY projects, sign up for one of our workshops. You’ll find the complete list here.
By Riley Stewart